


The extruder on your Asterid model 3D printer is made up of the hot-end (the nozzle, heater block, and barrel, heat sink, cooling fan) and the cold-end (a stepper motor, drive gear and filament tension spring). The filament tension spring is what makes loading the extruder on your Asterid printer a breeze.
Step 1:
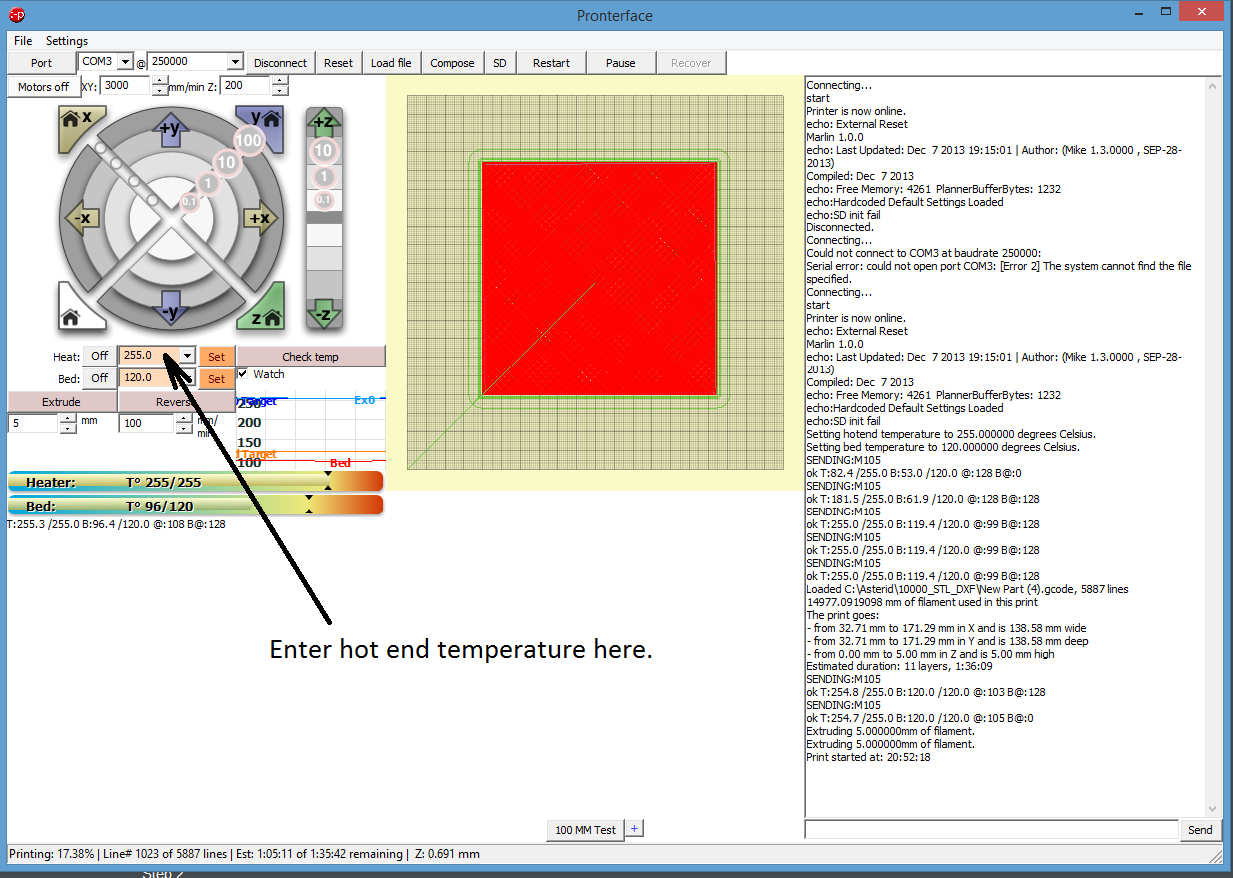
Use Pronterface to heat the hot end to the appropriate temperature for the type of filament you are loading. This temperature can vary depending on the type of plastic, the manufacturer of the filament, and even the color of the filament. However, we recommend 255�C for ABS and 235�C for PLA.
Step 2:
Once the hot end has reached the set point temperature (use the check now button on the Pronterface control panel to measure current temperature of the hot end) you can continue loading the filament. You may install the roll of filament (1.75mm diameter) on the spool holder of the machine if you haven't done so already. Remove any previous filament from the extruder by pressing reverse in Pronterface until the filament is completely out of the extruder. Cut the end of the filament to be loaded square. The filament is naturally curved use your fingers to straighten out the filament.
Step 3:
Completely loosen the filament tension spring by turning the wing nut on the cold end of the extruder counterclockwise and swing the filament tensioner open. Slide the filament through the entrance hole on top of the cold end all the way through the hot end until plastic can be seen exiting the nozzle. Next tighten the filament tension spring to the desired tension. The amount of tension needed will depend on the filament being used (type of material as well as manufacturer).
Step 4:
Use the extrude control in Pronterface to test that your filament is loaded correctly. Set the amount to 100 mm and press extrude. You should see 100mm of plastic extrude from the hot-end. If material does not exit the nozzle, the amount of tension on the tension spring may need to be adjusted. Repeat steps 2-4 until the material extrudes properly.
