


Your 3D printer is supplied with a Ramps 1.4 controller, which uses an Arduino MEGA 2560 control board. The following instructions will help you set-up your 3D printer by first installing the Arduino driver which creates a COM port in your Windows device manager. Pronterface will use this COM port to communicate with your 3D printer.
RAMPS 1.4 driver installation
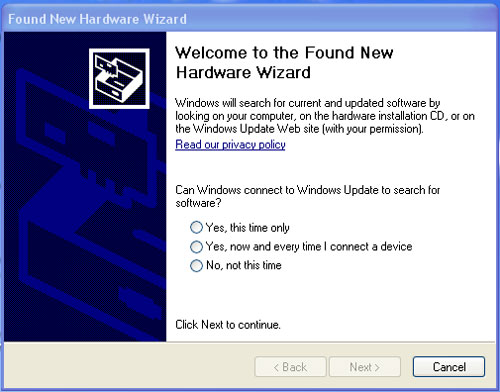
STEP 1
A “Found New Hardware Wizard” Dialogue window should appear, Click “No, not this time” and then Click “Next”.
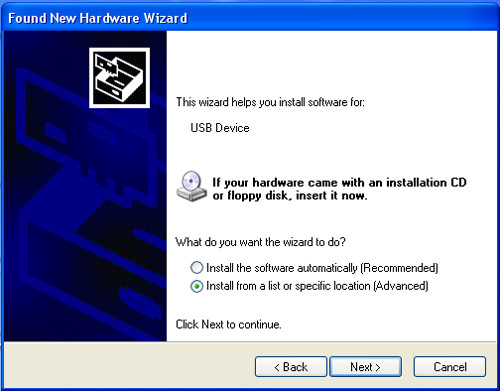
STEP 2
Click “Install from a list or specific location (Advanced)” and Click “Next”.
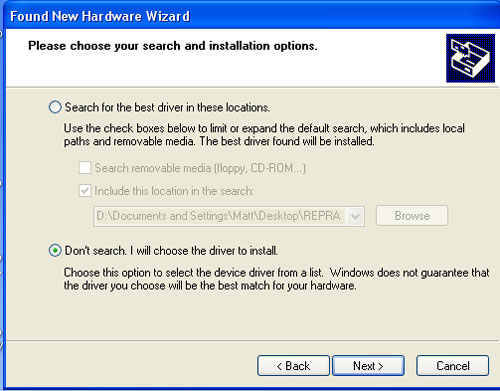
STEP 3
Click “Don’t Search. I will Choose the Driver to Install” and Click “Next”.
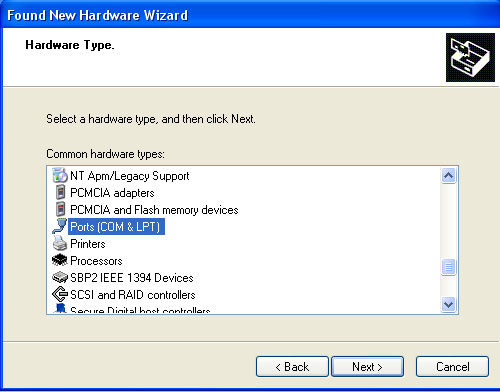
STEP 4
Click “Ports (COM & LPT)” and Click “Next”.
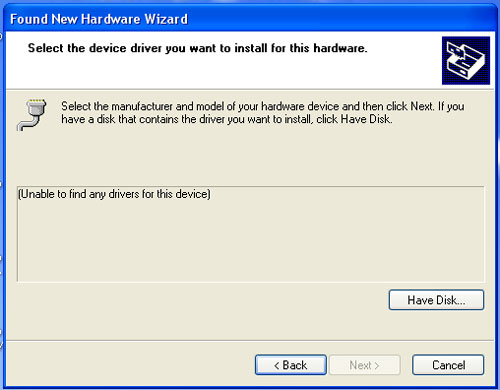
STEP 5
Click “Have Disk”.
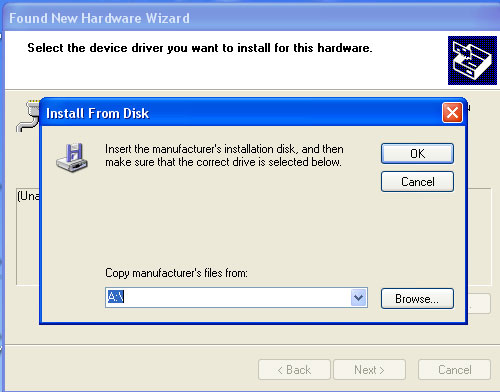
STEP 6
Click “Browse”.
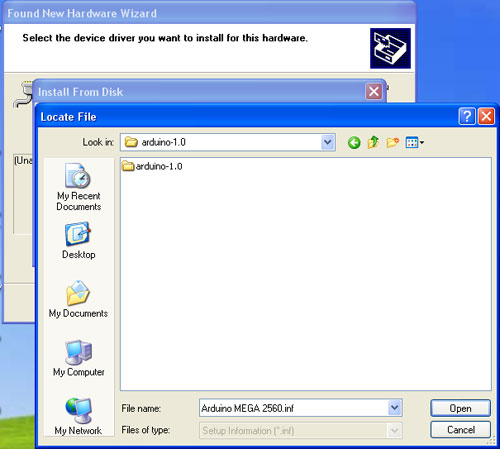
STEP 7
Navigate to your “Arduino 1.0” folder and then into “Drivers”.
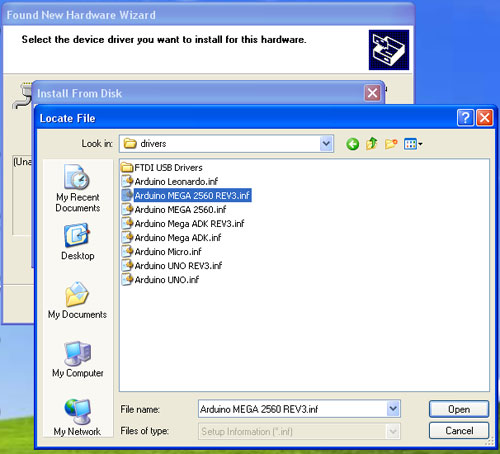
STEP 8
Click “Ardunio MEGA 2560 REV3.inf” and Click “Open”.
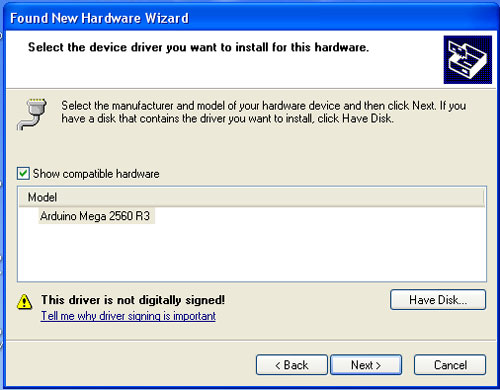
STEP 9
Click “Ardunio MEGA 2560 R3” and Click “Next”.
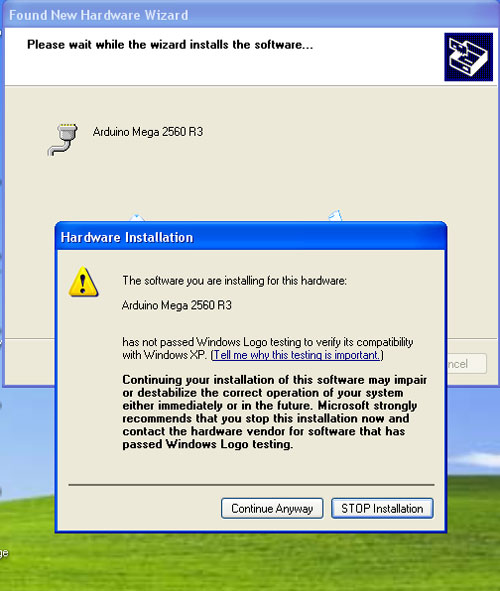
STEP 10
Click “Continue Anyway.
STEP 11
Click “Finish”.
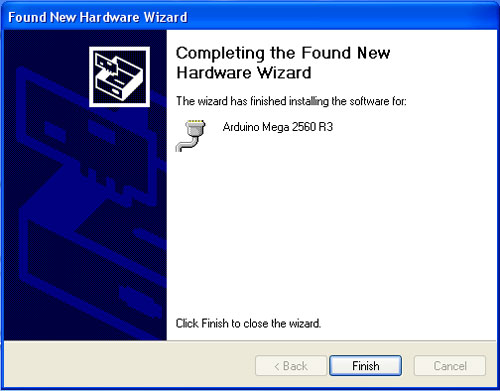
STEP 12
Your Ramps 1.4 3D printer controller is now setup to communicate with your computer, you should see the following message pop up after selecting “Finish”. Now, we need to prepare the COM port by setting the port speed.

RAMPS 1.4 COM PORT settings
STEP 1
Navigate to the “Windows Control Panel” and select “system” and select the “hardware “ tab
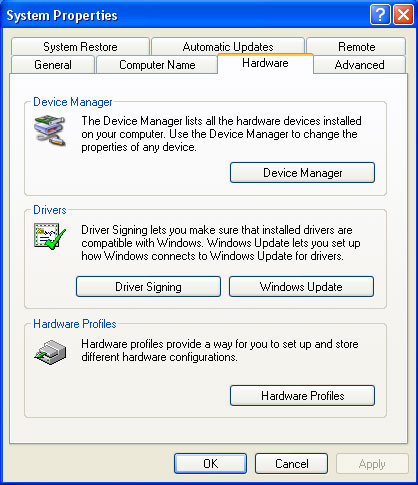
STEP 2
Navigate to the “Windows Control Panel” and select “system” and select the “hardware “ tab
STEP 3
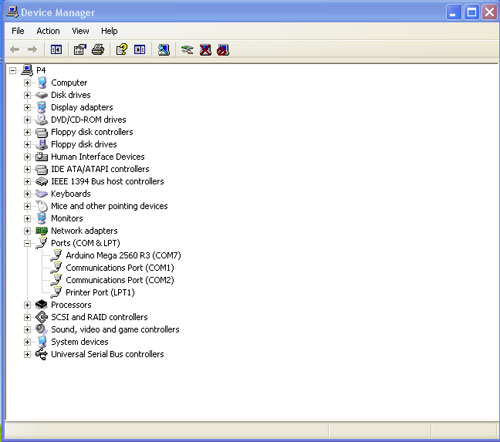
Navigate to “Ports (COM & LPT)” and expand it by selecting the “+” symbol, now select “Arduino MEGA 2560 R3” and right click and select “Properties” .
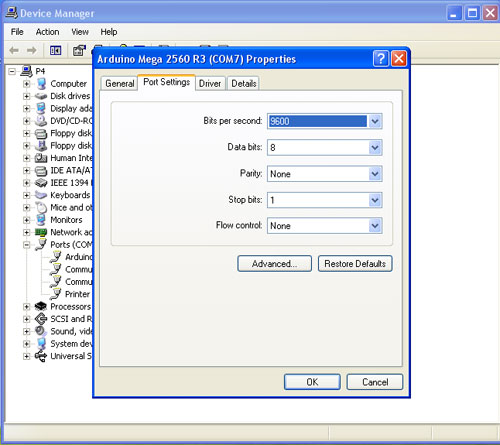
STEP 4
Select “Bits per second”.
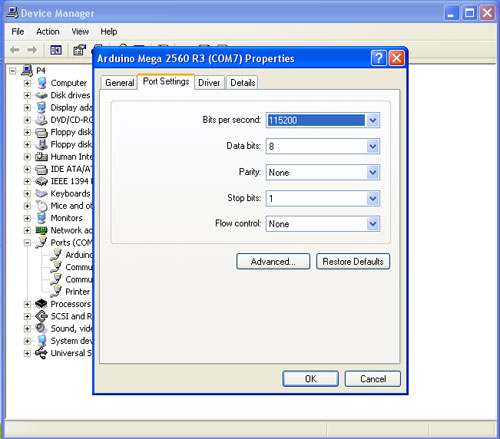
STEP 5
Select the “115200” from the drop down menu.
We can now proceed to install Pronterface and Slic3r. Pronterface is used to control your 3D printer and slic3r prepares your 3D files by converting them into G-code which are fed to your 3D printer by pronterface.
